
What is it, and why use it?#
VBand is a free, browser-based “virtual CW band” from Ham Radio Solutions. Plug a key or paddle into your computer, open the site, join a channel, and you’re sending and receiving Morse code with whoever else is in that channel — no radio, no antenna, no license, and no band conditions to fight.
That last part is the real reason VBand earns a spot in your CW toolkit. In a perfect world, at the peak of the solar cycle, every CW student would just get on the air and practice with real stations. There’s genuinely no substitute for an on-air QSO — nothing teaches you to copy code through noise, fading, and a station with a slightly sloppy fist like the genuine article does. But solar cycles rise and fall, band conditions aren’t always cooperative, and if you’re going through a CW class like CW Academy, your classmates are scattered all over the continent (or beyond), not conveniently down the block. VBand solves the scheduling and propagation problem: everyone just needs a browser and an internet connection, and suddenly a study group in four time zones can meet up for a QSO on demand.
It’s also just a lower-stakes place to practice than jumping straight onto HF. If you send a shaky “CQ” on 40 meters, the whole band hears it. If you fumble a QSO with a classmate on a private VBand channel, nobody but the two of you ever knows.
What equipment do you need?#
VBand runs in the browser, so the software side is simple: it works on Windows, Mac, and Linux, and the official USB paddle interface itself has been tested on Windows, Mac OS, Linux, and Android. Chrome is the best-supported browser; Firefox is also reported to work well.
On the hardware side, you need two things:
A morse key or paddle — whatever you already use for CW, straight key or iambic paddle, will work fine.
An interface to get that key talking to your computer — this is the piece that actually matters, and you have two solid options:
The VBand USB Paddle Interface (click the Store tab once you’re on the site) — Ham Radio Solutions’ own official adapter, $25 USD plus shipping. It has a 3.5mm TRS jack for your key or paddle and works by simulating keyboard presses, which is all VBand’s website needs to hear you.
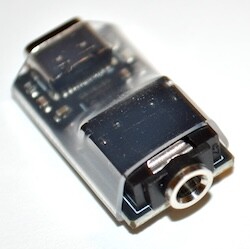
The Vail Adapter — a similar USB key-to-computer interface from the Vail CW project, priced comparably (models currently run from about $20 to $30 depending on features; see their device comparison page for the full lineup).
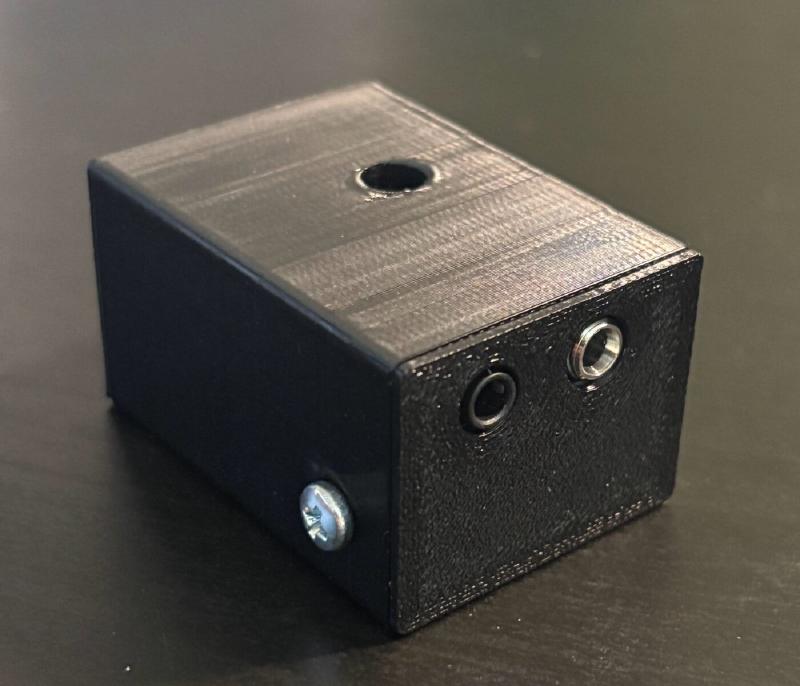
They’re similar in price, and either one will get you into a VBand channel. I went with the Vail Adapter, because it does a lot more than just VBand. Two things sold me:
- Vail Zoomer — a free app that merges your key’s sidetone directly into your Zoom, Teams, Discord, or Meet audio, so your CW class can hear your keying without you fumbling a second oscillator or holding a mic up to a speaker. I wrote up the full setup for that in an earlier guide — worth a read if a CW class or club net is part of why you’re doing this.
- Vail Training Tools — a large, free library of practice tools that plugs straight into the same adapter: copy drills that build from single characters up through full callsigns and Q-codes, a send-practice tool with real-time feedback, a QSO simulator for pileup practice, and even a head-copy trainer for realistic QSO practice.
If you only care about VBand itself, the official adapter is a perfectly good, purpose-built choice. If you want one adapter that also opens the door to Zoom-friendly sidetone and a much bigger practice library, the Vail Adapter is the better long-term buy.
Setting up VBand#
Plug in your adapter, then head over to hamradio.solutions/vband.
Click the Settings tab at the top of the page. This is where you tell VBand who you are and how your key behaves.
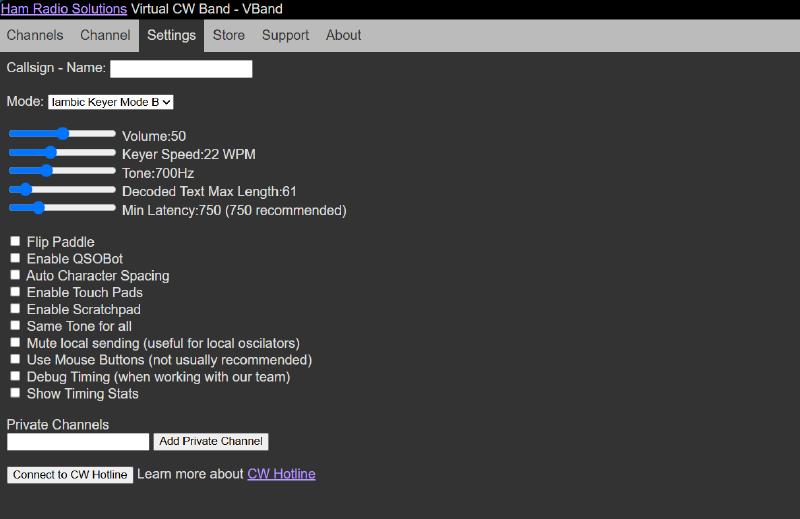
Enter your call sign in the “Callsign - Name” field at the top. This is what other operators will see on the channel list.
Pick your keyer mode. The Mode dropdown covers the usual options — straight key, Iambic A, Iambic B, Ultimatic, and bug. If you’re running a standard iambic paddle, Iambic Keyer Mode B is the right call for most of us; it’s also what most modern transceiver keyers default to, so your fist won’t have to adjust between the radio and VBand.
Set your keyer speed, tone, and volume with the sliders. Speed is in WPM, tone in Hz — set them to whatever you practice at on the air, so your ear stays calibrated to one speed and pitch rather than juggling different settings in different places.
One setting worth understanding rather than just leaving alone: Min Latency, defaulted to 750ms. Every letter you send has to travel over the internet to VBand’s server and back out to whoever you’re working, and that trip doesn’t take the same amount of time twice — this is “jitter,” and it’s the same phenomenon that makes a video call occasionally stutter. VBand adds a small buffer before playing back what you sent, so that the normal variation in network delivery time doesn’t turn into garbled spacing between your dits and dahs. Turning it down makes your sending feel more instantly responsive to you, but risks choppy-sounding code on the other end if your connection is anything less than rock solid. 750ms is a sensible starting point — leave it there unless you have a specific reason to change it.
Work through the checkboxes as you like. There’s a long list — Flip Paddle, Enable QSOBot, Auto Character Spacing, Touch Pads, Scratchpad, Mute Local Sending, and a few others. I don’t have any of them checked, but they’re there to explore; none of them are required to get on the air.
Setting up your own private channel#
This is the step I’d consider close to mandatory if you’re using VBand for a class or a small group, rather than just dropping into the public rooms.
Here’s why: if you never create a private channel, you’re stuck practicing in VBand’s public channels, where you never know who’s going to wander in — someone with a shaky fist still learning the ropes, or, occasionally, someone with an attitude. Sometimes a public room works fine, especially if everyone’s polite and takes turns. But more often it ends up feeling like a crowded bar where everybody’s trying to talk over everybody else — not exactly the calm, focused environment you want when you’re trying to nail down your copy.
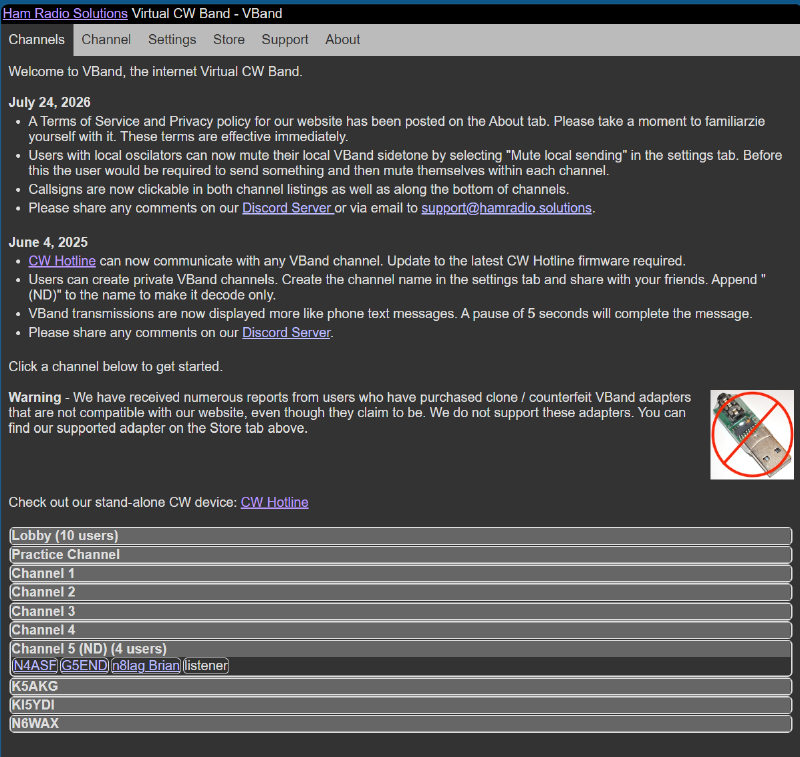
A private channel fixes this instantly, and it costs you nothing but a few seconds:
- On the Settings tab, scroll down to the Private Channels section.
- In the empty text box next to the Add Private Channel button, type a name for your channel — your call sign works well, or any other name that’s easy to share and unlikely to collide with someone else’s.
- Click Add Private Channel.
That’s it. Your new channel now shows up in your own channel list, and anyone you want to meet there just needs to do the exact same thing on their end — type your channel’s name into their own “Add Private Channel” box and click the button. No password, no invite link, no account to create. They now have permanent access to your room, right alongside whatever public channels they already had.
It’s a nice piece of design: dead simple to set up, dead simple to share, and it turns VBand from “hoping the public room is quiet tonight” into “meet me in my room at 7pm” — which is exactly what a CW class or a standing practice group with a few buddies actually needs.